


You’ve probably landed here squinting at two product pages, trying to figure out why one camera costs $30 and the other costs $60 when both say “2K” and “night vision” right on the box. The spec sheets all sound the same, and nobody tells you what actually separates them once you’re past the marketing copy.
This iCSee vs Tapo guide focuses on the differences that actually matter when you’re choosing between them: what kind of product each name really represents, how image quality and app experience compare, where each one fits best, and whether you can connect either to your own NVR or Home Assistant setup. By the end, you’ll know which one fits your situation — not just which one has the bigger number on the box.
iCSee vs Tapo: What Are You Actually Buying?
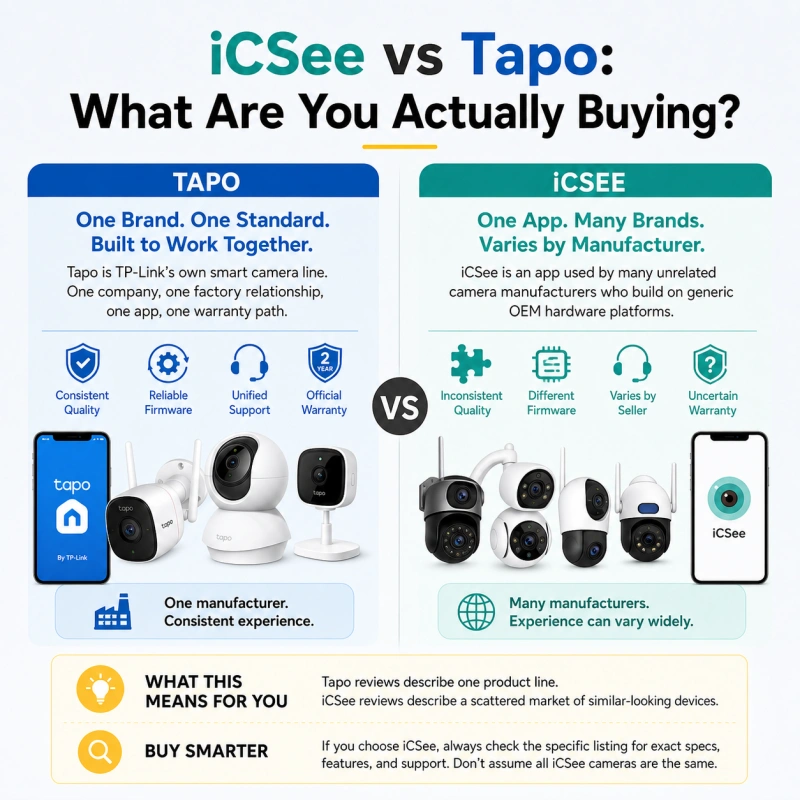
Before comparing specs, it helps to understand what “iCSee” and “Tapo” actually are, because they aren’t the same kind of thing. Tapo is TP-Link’s own smart-home camera line — one company, one factory relationship, one app, one warranty path. iCSee is different: it’s primarily an app name used by many unrelated camera manufacturers who build on generic OEM hardware platforms, then ship their cameras with the iCSee app pre-installed.
That distinction explains most of the inconsistency you’ll find in iCSee reviews. Two cameras both labeled “iCSee” can come from two different factories, with different sensors, different firmware habits, and different customer support — the app is just the common thread. Tapo cameras come from one manufacturer, so a given Tapo model tends to behave consistently across units and over time.
What this means in practice: if one buyer says “my iCSee camera is great” and another says “mine is disappointing,” they may genuinely be describing hardware from two different companies that just happens to share an app icon. When you’re comparing iCSee vs Tapo, keep in mind that Tapo reviews describe one product line, while iCSee reviews describe a scattered market of similar-looking devices — so any iCSee spec should be checked against the specific listing rather than assumed to apply across the board.
iCSee vs Tapo: Which Has Better Image Quality?
Tapo generally has the edge on image quality, particularly at night, because its current lineup is built around a consistent set of sensors and processing. iCSee’s picture quality can range from surprisingly good to mediocre depending on which manufacturer built the specific model, so it’s worth checking the listing’s actual specs rather than assuming.
| Aspect | iCSee | Tapo |
|---|---|---|
| Daytime detail | Varies by manufacturer; check the listing’s stated resolution and lens | Generally consistent detail across the current lineup, per TP-Link’s published specs |
| Night vision (infrared) | Range and clarity vary by manufacturer, commonly shorter-range on budget models | Longer effective IR range on most 2K+ models, per manufacturer specs |
| Color night vision | Uncommon on budget SKUs | Available on select models with a built-in spotlight |
| Video codec | H.264 is common; H.265 support depends on the manufacturer | H.264 and H.265 supported on most current models |
| Frame rate | Varies significantly by manufacturer and model — verify on the specific listing | Generally smoother motion on 2K and 4MP models, per manufacturer specs |
H.265 is worth checking either way, since it compresses video more efficiently than H.264 at the same visual quality. That translates to longer microSD retention and lower cloud storage costs for the same amount of footage, so an H.264-only iCSee model will fill a card faster than a comparable H.265 camera.
iCSee vs Tapo: Which Is Better for Different Uses?
The right answer to iCSee vs Tapo depends less on which brand is “better” overall and more on what you’re actually trying to monitor. A nursery camera and a warehouse-entrance camera have different priorities, and each brand tends to suit a different kind of buyer.
| Use case | Better fit | Why |
|---|---|---|
| Baby monitoring / nursery | Tapo | AI-based cry detection and person/motion distinction on higher-end models reduce false alarms |
| Pet monitoring | Tapo | Person/pet-shape detection cuts down notifications compared to generic motion detection |
| Whole-home smart-home hub | Tapo | Works alongside Tapo smart plugs, locks, and Matter/Alexa/Google Home routines in one app |
| Budget multi-camera porch/driveway setup | iCSee | Lower per-unit price makes covering several entry points more affordable |
| Dual-lens or PTZ coverage | iCSee | Dual-lens and pan-tilt-zoom models are common and inexpensive, though “dual lens” doesn’t always mean two independently recorded streams — check the listing |
Tapo tends to earn its premium in scenarios where predictable AI behavior and a single unified app matter most, while iCSee earns its place where price per camera or an unusual form factor matters more than polish.
iCSee vs Tapo: App and Smart Home Experience
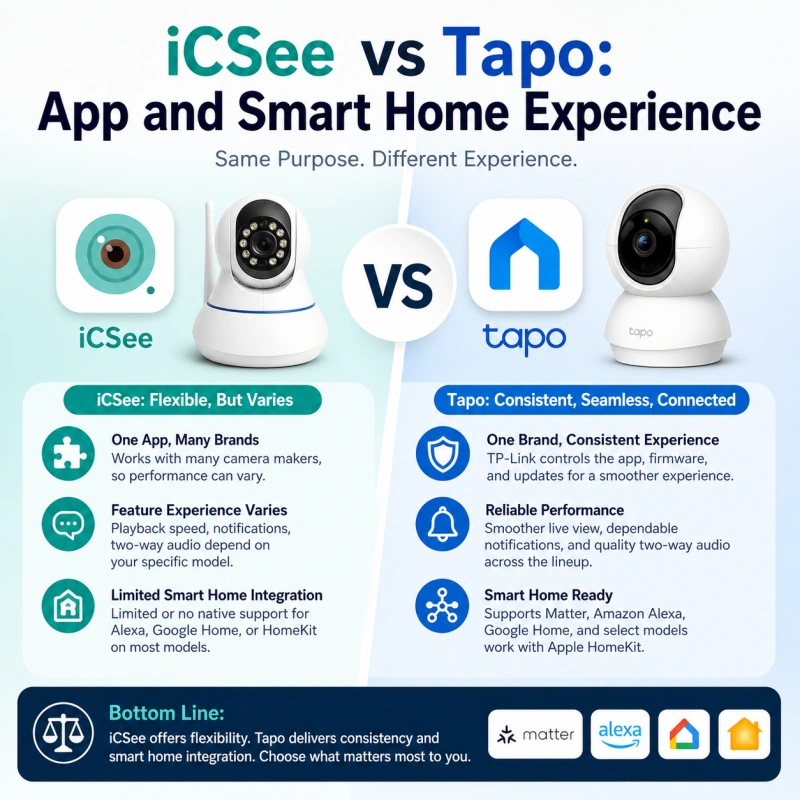
Tapo’s app experience is generally more consistent, since one manufacturer controls the interface, the notification system, and the update schedule. iCSee’s app works across many different camera makers, so day-to-day feel — playback speed, notification reliability, two-way audio quality — can vary from one model to the next even though the app looks identical.
Two-way audio is available on most cameras from both brands, though echo cancellation quality depends more on the specific model’s microphone and speaker than on the brand itself. The same is true for live-view responsiveness: it’s generally smoother on Tapo because the hardware and firmware are standardized, while iCSee’s responsiveness depends on the manufacturer behind your specific unit.
Smart home compatibility is where the two brands diverge more clearly. Tapo, backed by TP-Link, supports Matter, Amazon Alexa, and Google Home, with Apple HomeKit available on select models (sometimes requiring a separate Tapo Hub). iCSee, by comparison, has limited or no native integration with Alexa, Google Home, or HomeKit on most models — it’s built to run through its own app first, and third-party integration is the exception rather than the rule. If a unified smart home dashboard matters to you, that gap is worth weighing heavily.
iCSee vs Tapo: Storage, Privacy, and Cloud Plans
Both brands support local microSD storage on most models, plus optional cloud subscriptions, but they handle privacy features and firmware updates differently enough to matter for anyone thinking long-term.
| Feature | iCSee | Tapo |
|---|---|---|
| Local microSD storage | Supported on most models; max capacity varies by manufacturer | Supported on most models, typically up to 128GB-256GB |
| Physical privacy shutter | Model-dependent, not consistently offered | Common on indoor pan-tilt models |
| Custom privacy zones | Available on some higher-end models only | Available on most current-generation models |
| Cloud plans (US, approx.) | Roughly $3-$10/month depending on the provider and camera count | Roughly $3.50-$10/month (Tapo Care), tiered by camera count and retention window |
| Encryption | TLS in transit is common; at-rest encryption varies by manufacturer and isn’t always documented | TLS in transit; AES encryption on cloud storage, documented in TP-Link’s published security materials |
| Firmware updates | Cadence depends entirely on which manufacturer built the camera | More predictable, with a visible changelog in the Tapo app |
Firmware update cadence matters because that’s what patches security holes. This is really the core of the iCSee vs Tapo security story: Tapo’s single-manufacturer model makes update habits predictable, while iCSee’s update reliability depends on which of many possible manufacturers made your specific unit. A few basic steps make either brand meaningfully safer regardless of which you choose:
- Change the default admin password immediately, and don’t reuse a password from another account.
- Turn off remote/cloud access if you only plan to view footage on your home network.
- Enable two-factor authentication in the app if it’s offered.
- Put the camera on a separate guest or IoT Wi-Fi network, isolated from your other devices.
For a broader checklist on securing any connected camera, the Cybersecurity and Infrastructure Security Agency’s guidance on home network security is a solid outside reference, and it applies just as much to a $30 camera as a $300 one.
Can iCSee and Tapo Work With NVR or Home Assistant?
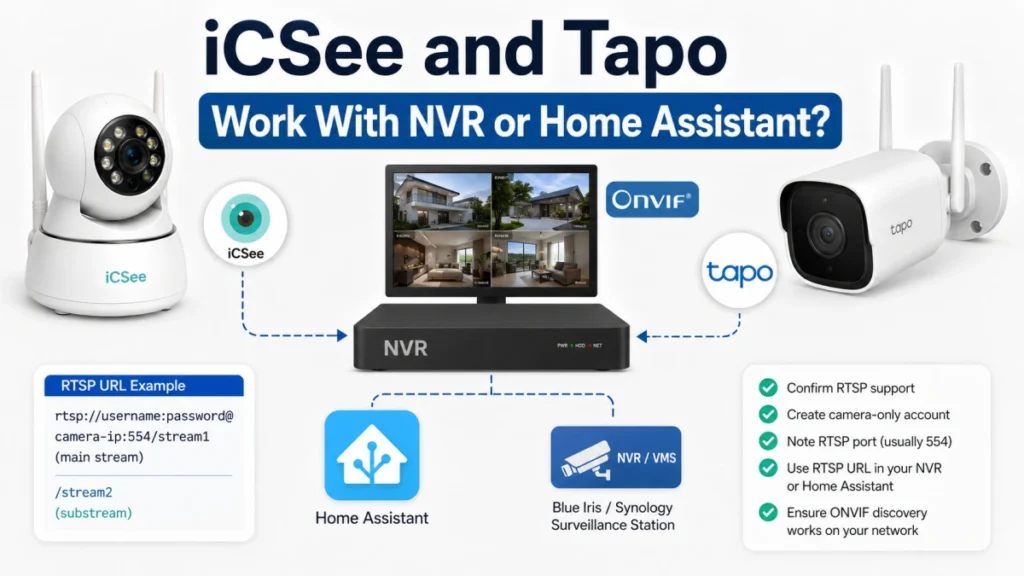
Yes, but only on specific models, and Tapo currently has broader, better-documented RTSP and ONVIF support than iCSee — mainly because Tapo maintains one firmware family instead of many. This matters most to anyone running Blue Iris, Synology Surveillance Station, or Home Assistant instead of a manufacturer’s app.
Here’s the practical setup process once you’ve confirmed your specific model supports RTSP:
- Confirm RTSP support directly — on Tapo, this is usually listed under “Advanced Settings > Camera Account” and is mainly available on wired models rather than battery-powered ones; on iCSee, check the product listing or ask the seller, since support isn’t exposed in every model’s app menu and varies by manufacturer.
- Create a dedicated camera-only username and password inside the app (don’t reuse your main login).
- Note the RTSP port — commonly 554 on Tapo models, though it can vary by firmware on iCSee.
- Build the stream URL, typically
rtsp://username:password@camera-ip:554/stream1for the main stream, or/stream2for a lower-resolution substream. - Add that URL as a generic RTSP/ONVIF source in your NVR or Home Assistant, and confirm ONVIF auto-discovery finds the camera on your local subnet.
Because H.265 compresses more efficiently than H.264, Tapo’s broader H.265 support gives it an edge for anyone running several cameras on the same network. If a camera won’t show up in your NVR, the usual suspects are the camera and NVR sitting on different network segments, a firewall blocking the RTSP port, or a firmware update that quietly dropped RTSP support — checking the camera’s own app for a “local network only” or “third-party access” toggle solves this more often than people expect.
iCSee vs Tapo: Price and Which One Should You Buy?
Tapo tends to win on long-term reliability and smart home range, while iCSee wins on upfront price — so the right pick in the iCSee vs Tapo decision comes down to what you’re optimizing for.
| iCSee | Tapo | |
|---|---|---|
| Typical US price (indoor) | $20-$35 | $25-$40 |
| Typical US price (outdoor) | $35-$60 | $40-$70 |
| Outdoor durability | Weather-resistant ratings vary by manufacturer; check the specific listing | Weather-resistant ratings (IP65/IP66) are consistently documented across the current lineup |
| Warranty (US) | Typically routed through the seller or manufacturer, terms vary | Usually 12-24 months through TP-Link directly |
Choose iCSee if:
- The lowest upfront price matters more than a polished, unified experience.
- You want an unusual form factor — dual-lens, PTZ, solar, or bulb-style — at a low cost.
- You’re comfortable verifying specs (resolution, RTSP support, microSD limits) on the exact listing before buying.
Choose Tapo if:
- You want a standardized product line with predictable behavior across models.
- App experience, notifications, and playback consistency matter to you.
- You rely on Alexa, Google Home, Matter, or HomeKit integration.
- You want clearer manufacturer support and firmware update history.
Frequently Asked Questions
Which is better for a cheap multi-camera setup, iCSee or Tapo?
iCSee is usually the better choice if you need several cameras and want to keep the upfront cost low. Many iCSee cameras are sold at lower prices, and dual-lens and PTZ models are common. Tapo usually costs more, but it offers a more consistent app experience, firmware support, and smart-home integration.
Which is better for local storage, iCSee or Tapo?
Both iCSee and Tapo support local microSD storage on many models, so you do not always need a cloud plan. iCSee storage options vary by manufacturer and camera model, while Tapo provides more consistent specifications across its product line. If local recording is important, check the supported card capacity and recording features of the exact model before buying.
Do iCSee and Tapo cameras support 5GHz Wi-Fi?
Many budget iCSee and Tapo cameras support 2.4GHz Wi-Fi only. Some newer Tapo models support both 2.4GHz and 5GHz. If your router combines both bands under one Wi-Fi name, check the camera’s requirements before setup, as a 2.4GHz connection may be required for pairing.
Do iCSee and Tapo cameras support RTSP and ONVIF?
Some iCSee and Tapo cameras support RTSP or ONVIF, but it depends on the specific model. Tapo generally has broader and better-documented support, while iCSee support varies between manufacturers. If you plan to connect a camera to an NVR, Blue Iris, Synology Surveillance Station, or another third-party system, confirm RTSP or ONVIF support before buying.