
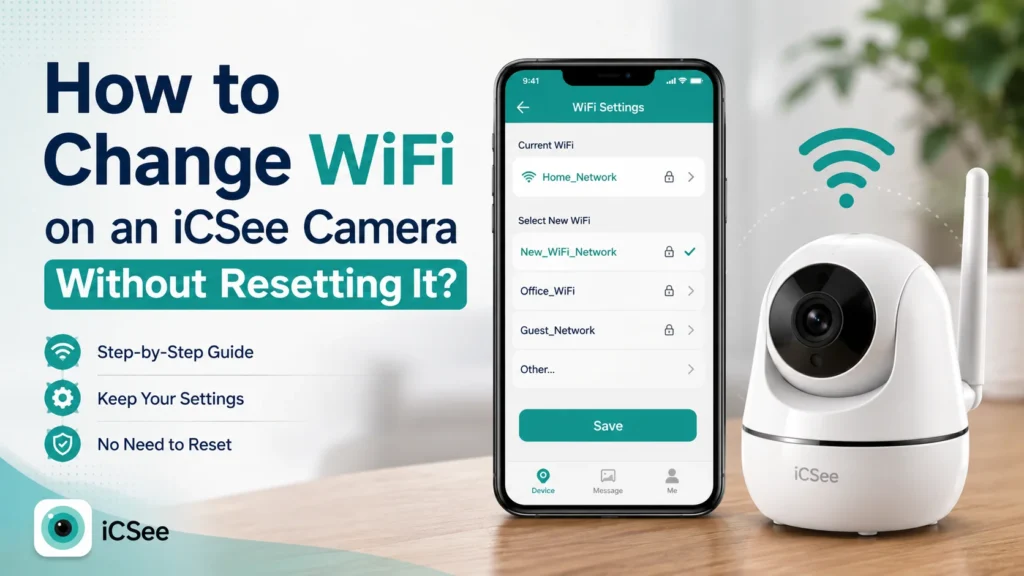


You moved your router. Or your internet provider swapped in a new one. Or you just changed your WiFi password because a neighbor guessed the old one way too easily. Now your iCSee camera is offline, and the app keeps asking you to “add device” like it’s never seen your camera before. The obvious fix that everyone suggests is a factory reset — but that means losing your camera name, your motion zones, your cloud settings, and sometimes your recording history too.
Here’s the good news: in most cases, you don’t need to reset an iCSee camera just to switch it to a new WiFi network. This guide walks through the actual method the iCSee app uses to update WiFi credentials, what to do when that method fails, and why some setups genuinely do force you back to a full reset. By the end, you’ll know exactly which category your camera falls into and how to fix it without starting from zero.
Why Does an iCSee Camera Need a Fresh WiFi Connection in the First Place?
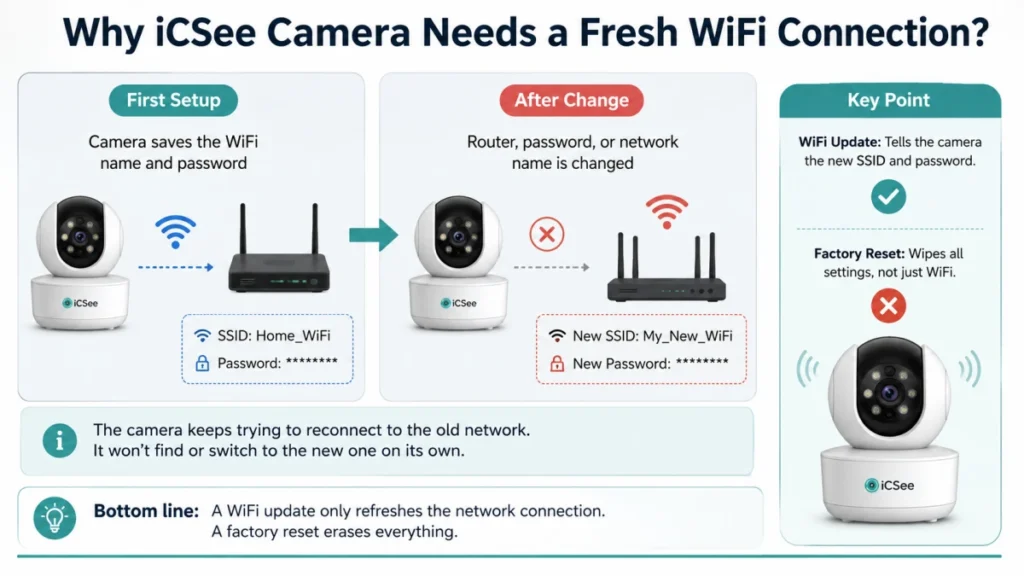
An iCSee camera doesn’t store your WiFi password the way a phone does. It saves the network name (SSID) and password at the moment you first set it up, then keeps reusing those same credentials to reconnect every time it boots. Change the router, change the password, or switch the network name, and the camera has no way to know — it just keeps knocking on a door that no longer opens.
This is why the camera doesn’t “notice” a new network on its own. It needs to be told, deliberately, what the new SSID and password are. That’s a WiFi update, and it’s a completely different action from a factory reset, which wipes every setting the camera has ever learned, not just the network credentials.
Do You Really Need a Full Reset to Switch Networks?
No — not for a normal WiFi change. If your iCSee camera is still bound to your account and still physically works (the light comes on, you can hear it beep or see it move), you can usually push new WiFi credentials to it straight from the app, and it’ll reconnect within a minute or two, with all your saved settings intact.
A reset only becomes necessary when the camera has lost its pairing with the app entirely, when the WiFi module itself has glitched and stopped responding to configuration signals, or when you’re moving the camera to a totally different account. If you’ve just set up an iCSee camera for the first time and it’s working normally, changing WiFi later should be quick.
How to Change WiFi on an iCSee Camera From the App?
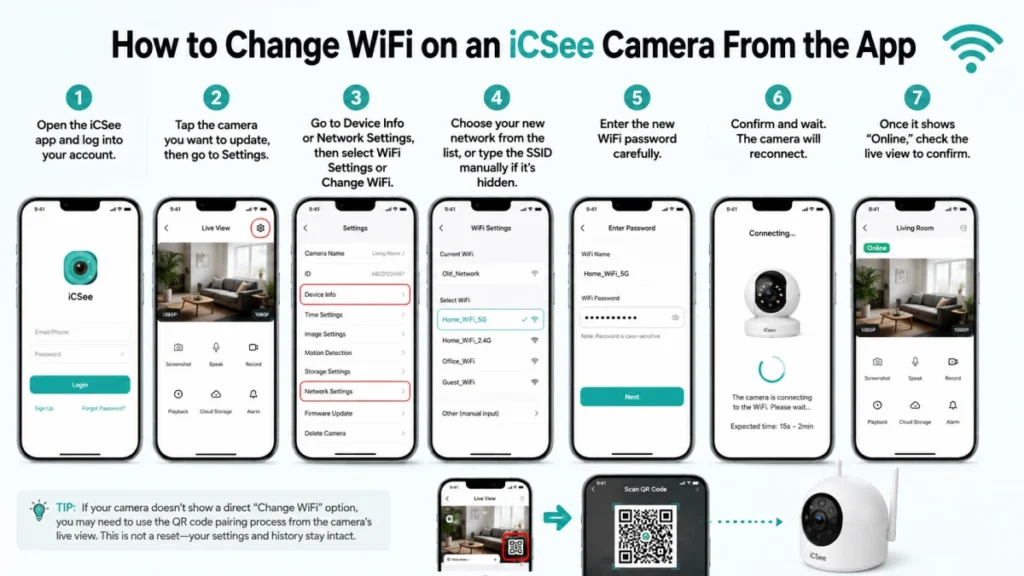
Here’s the step-by-step process most iCSee cameras support, whether the camera connects over WiFi directly or through a smart plug/hub setup.
- Open the iCSee app and log into the account the camera is bound to.
- Tap on the camera you want to update, then go to Settings (usually the gear icon in the top corner of the live view screen).
- Look for Device Info or Network Settings, then select WiFi Settings or Change WiFi.
- Choose your new network from the list, or type the SSID manually if it’s hidden.
- Enter the new WiFi password carefully — extra spaces or autocorrect changes are a common cause of failure here.
- Confirm and wait. Most iCSee cameras play a voice prompt or flash their LED while reconnecting, which can take anywhere from 15 seconds to 2 minutes.
- Once the app shows the camera as “Online,” pull up the live view to confirm the video feed is actually working, not just the connection status.
If your camera model doesn’t show a direct “Change WiFi” option, it may need to go through the QR code pairing process again — same idea, just triggered by scanning a code from the camera’s live view instead of typing credentials directly. That’s still not a reset; your camera’s history and settings stay untouched.
What to Do When the iCSee Camera Won’t Accept the New WiFi
Sometimes the reconnection step above just hangs, or the app throws an error. This is the point where most people give up and reset the camera — but the cause is usually one of a handful of predictable issues.
| Problem | Likely Cause | What to Try |
|---|---|---|
| App says “Connection Timeout” | Camera can’t reach the new network’s signal strength | Move the camera closer to the router during setup, then relocate it after it connects |
| WiFi accepted but camera stays offline | Camera is on 5GHz, which most iCSee models don’t support | Switch your router (or a guest network) to 2.4GHz for setup |
| Password rejected every time | Special characters or autocorrect changing the password | Type the password in a notes app first, copy-paste it into the WiFi field |
| Camera reconnects but shows no video | Bandwidth issue or a stale app cache, not a WiFi failure | Force-close and reopen the app, or check our guide on an iCSee camera showing no video after reconnecting |
| App won’t recognize the camera at all | Camera got unbound from the account during the process | Try re-adding it, or work through the steps to unbind an iCSee camera cleanly before pairing it again |
Run through this table before touching the reset button. Nine times out of ten, the fix is one of these, not a hardware failure.
Switching to a New Router or 5GHz Network: What Actually Changes
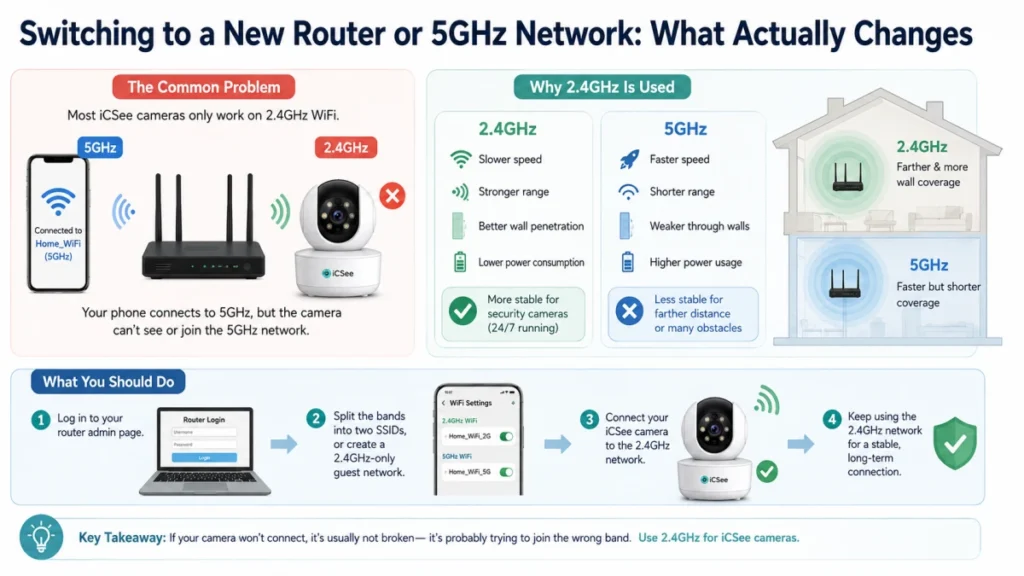
If you just bought a new router, there’s one detail that trips up almost everyone: most iCSee cameras only connect over the 2.4GHz band, not 5GHz. Modern routers often broadcast both bands under the same network name, so your phone might be happily connected to 5GHz while the camera keeps failing to see any signal at all, even though the network “exists.”
The 2.4GHz band trades speed for range and wall penetration, while 5GHz is faster but drops off faster with distance and obstacles, according to Intel’s breakdown of WiFi frequency bands. That’s exactly why budget security cameras like iCSee models stick to 2.4GHz — it’s more forgiving over distance, and it uses less power on a device that’s often running 24/7.
So if your new router combines both bands into a single network name, either split them into two separate SSIDs in your router’s admin panel, or set up a temporary 2.4GHz-only guest network just to get the camera reconnected. Once it’s online, you can leave that network as-is for the camera long-term.
When a Factory Reset Actually Becomes Necessary
There are a few situations where skipping straight to a reset does make sense, and trying to force a WiFi change first just wastes time:
- The camera shows a solid or unresponsive LED and won’t respond to any app commands at all.
- You bought the camera secondhand and it’s still bound to the previous owner’s account, with no way to unbind it remotely.
- You’ve tried the WiFi update process multiple times and it consistently fails at the same step, suggesting the WiFi module itself is stuck.
- You’re prepping the camera to be reused on a completely different network and account from scratch.
In any of these cases, the process is straightforward once you know where to look — our full walkthrough on the iCSee camera reset button covers exactly where it’s located on different models and how long to hold it. Just know that a reset wipes motion zones, camera naming, and any local settings, so it should be the last option, not the first.
After the WiFi Switch: Keeping Access Working for Everyone
One thing people forget after changing WiFi: if other household members had the camera added to their own phones, the network change doesn’t automatically update on their end. The camera itself reconnects fine, but shared viewers might see it as offline until the connection refreshes on their app too. If you’re setting this up for multiple people, it’s worth checking how to share iCSee camera access with family members so everyone’s app reflects the new connection correctly instead of just guessing why their feed stopped working.
FAQ
Does changing my WiFi password disconnect my iCSee camera automatically?
Yes. The moment the password changes on your router, the camera’s saved credentials stop working, and it drops offline immediately. It won’t reconnect on its own — you have to push the new password to it through the app.
Can I change the WiFi on an iCSee camera without using the app?
Not on most models. The WiFi credentials are configured through an audio pairing tone or QR code that the app generates, so there isn’t a way to type a new password directly on the camera itself. A few models with a physical screen or buttons are the exception, but that’s rare for iCSee’s budget camera lineup.
Why does my iCSee camera keep saying “connection timeout” during WiFi setup?
This almost always means the camera can’t get a strong enough signal from the new network, or it’s picking up a 5GHz broadcast it can’t actually use. Moving the camera closer to the router during setup, or switching to a 2.4GHz-only network temporarily, fixes this in most cases.
Do I lose my recordings if I just change the WiFi network?
No. A WiFi update only touches the network credentials. Local SD card recordings stay on the card, and cloud recordings stay tied to your account, not to the WiFi network the camera happens to be using.
Can I connect an iCSee camera to 5GHz WiFi?
Most iCSee camera models can’t. They’re built around 2.4GHz-only WiFi chips, which is common for budget security cameras since that band holds a connection better over distance. Always check that your router is broadcasting a 2.4GHz network the camera can actually see.
What if my iCSee camera won’t reconnect even after multiple WiFi attempts?
At that point, the WiFi module may be stuck rather than the settings being wrong. Power-cycling the camera (unplugging it for a full minute) before trying again resolves it sometimes. If it still won’t take the new network after that, a factory reset is the next step, followed by pairing it fresh.